

This post is my exploration/tutorial of the new Water system from unity for the high definition render pipeline, which is integrated into the HDRP package (v16.0.1).
If you want to start using a sample scene then continue on reading. If not I suggest you skip down to the configuration of the render pipeline and ignore the sample scenes. I must say the sample scenes do give a really good start.
Getting Started
First and foremost you water is available in the latest Tech stream version of Unity which is 2023.2 (currently in alpha, so things may change). I just started up version 2023.2.0 to be precise. Once installed go ahead and create a project using the 3D (HDRP) Template.
Starting from scratch you can import the samples in the HDRP package via the Package manager:

Configuration
Once you’ve done that you’ll notice you can’t see much water if you open one of the sample scenes. The water system requires you to enable a few graphics settings. Some of which aren’t directly apparent and may take some searching for here’s a quick overview of thier locations. If you click the buttons visible in the scene view you’ll get taken to the HDRP quality settings.
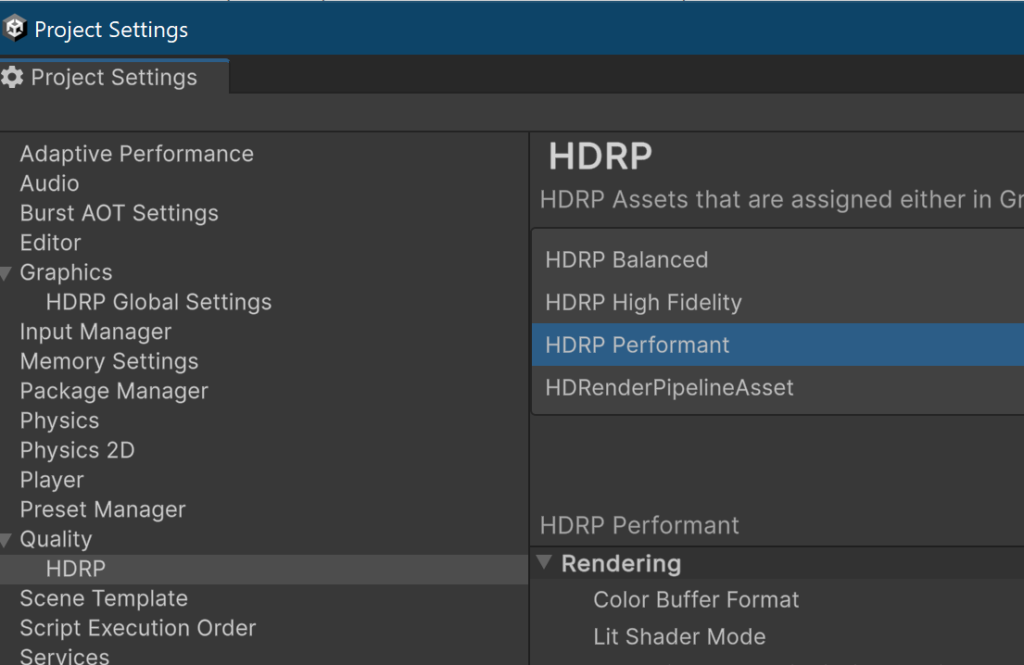
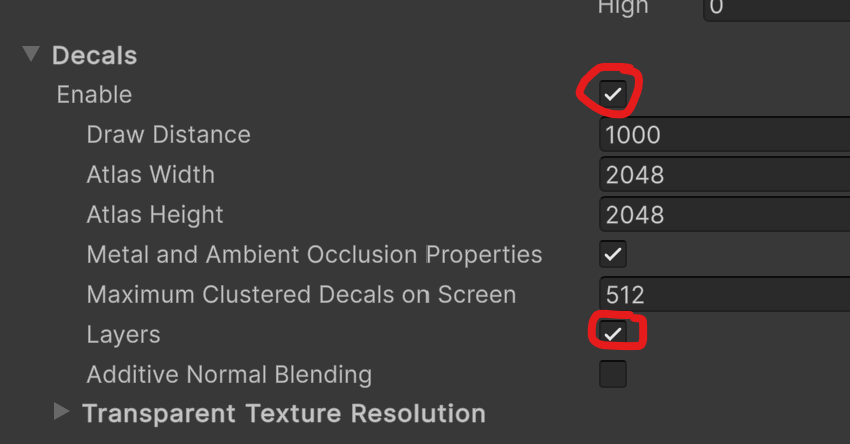
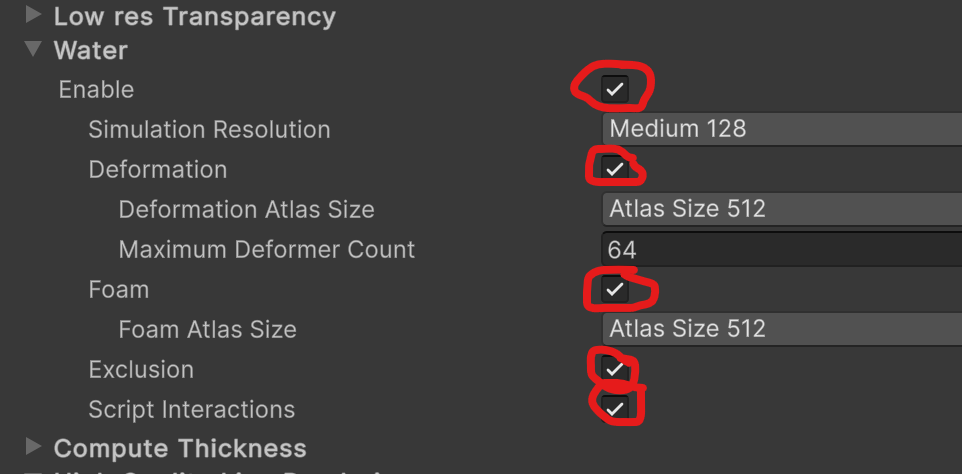
There you need to enable a few options:
– Rendering > Decals
- Rendering > Water
- Lighting (options under Volumetric and Reflections)
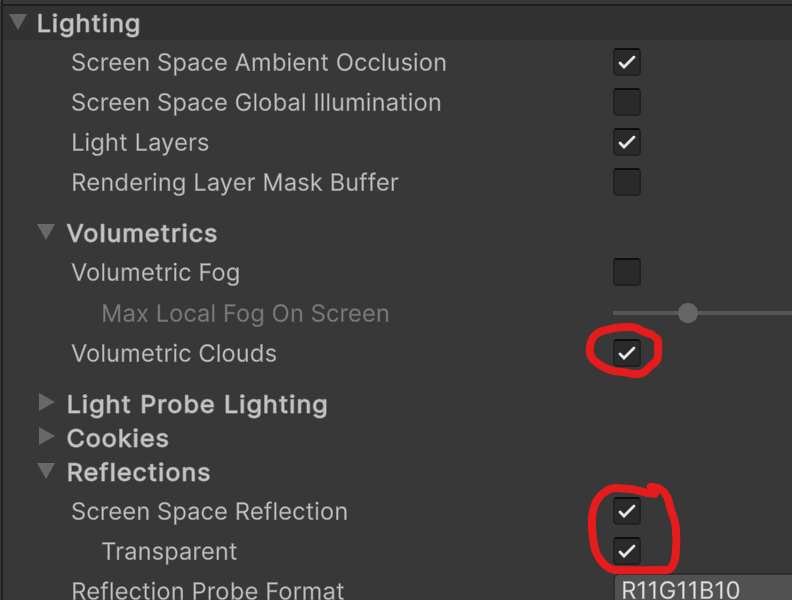
By now, if you have a sample scene open, you should see some water effects in the scene view and all the buttons for configuration should have disappeared. Yay Water!
Building a scene from scratch
Create a new outdoor HDRP Scene. From here you have a few options, if you’re like me you’ll want to apply some water to an existing mesh in one of your 3d models.
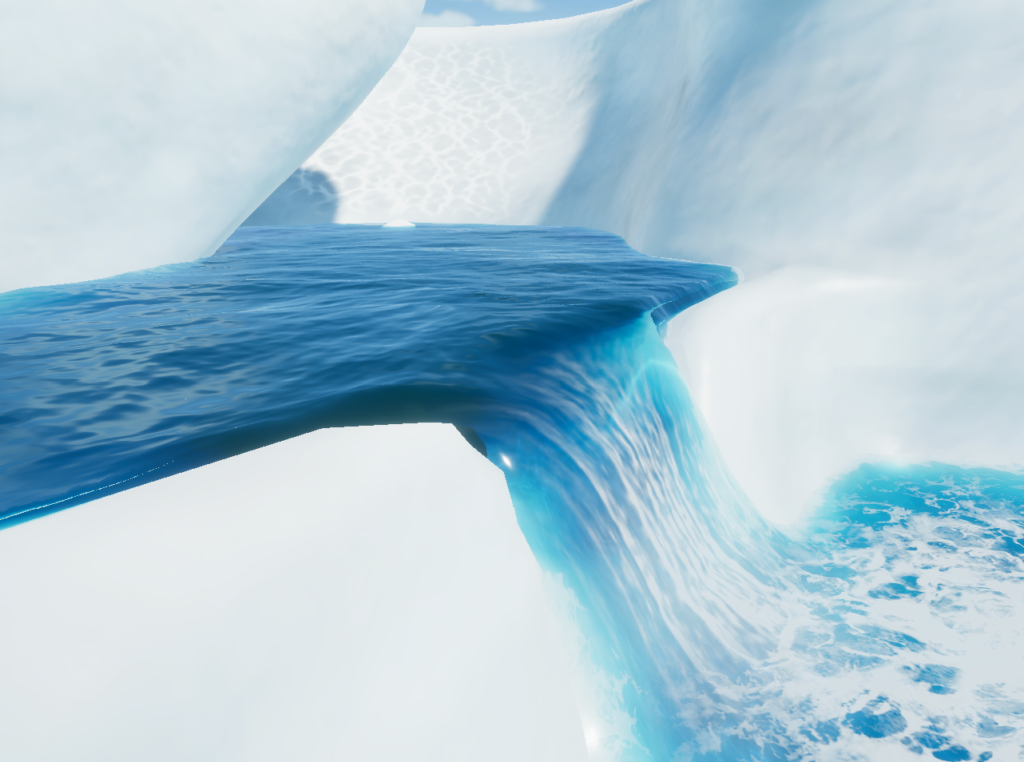
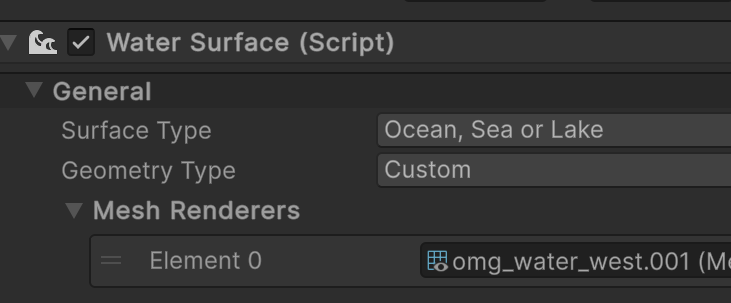
For that it’s best to create new water surfaces, in my situation I found using the “Ocean, Sea or Lake” surface the most realistic for our usecase. (I’ve been looking for typical brown/greenish dutch dark water, this works really good for that)
Once you have your water surface set the Geometry type to “Custom“. From there reference the mesh renderer (after doing that you can disable the mesh renderer) the water surface then has the shape of the mesh.
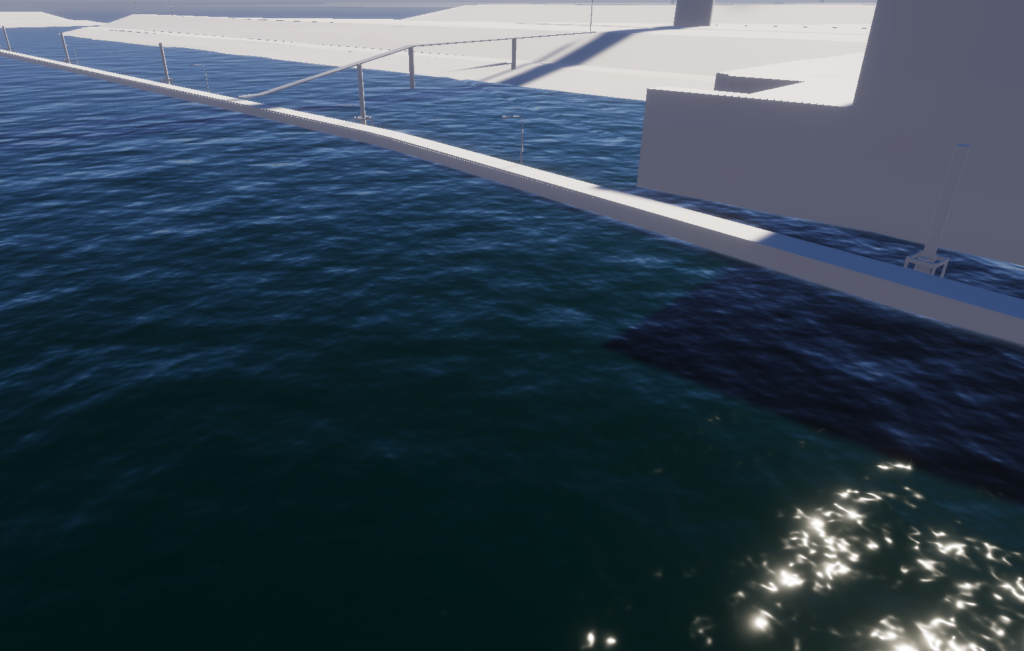
From there playing around with the Simulation and Appearance settings make magic happen.
In my endeavors playing around with this I went searching for some documentation on how to do deformation because that wasn’t completly straight forward. I only found some information pretty well buried in the HDRP documentation but still never got it to work for the lake, I’m guessing it has something to do with the mesh or the resolution of the deformation but thats a problem for future me. With a Pool surface, it worked just fine.
This water system definitly has potential. One issue I have yet to confront is blending two water surfaces together. Because they have different frequencies and need to blend at the edges.
If anyone has any suggestions or questions, let me know!
Leave a Reply